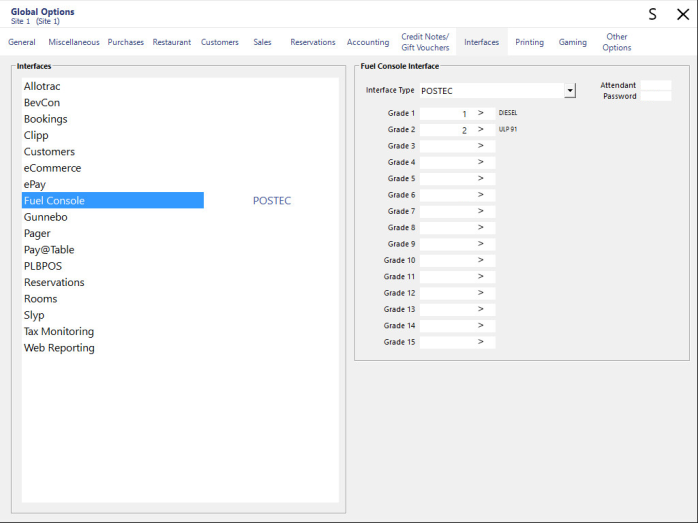
Go to Setup > Global Options > Interfaces > Fuel Console Interface.
In Global Options, you will need to link the Stock Items that were created as each grade of fuel that you will be selling.
Interface Type – Select POSTEC from the drop-down menu.
Grade 1-15 – Enter the Stock Item code for each required Grade of fuel that will be sold.
In addition to linking the Idealpos Stock Items to the Fuel Grades, you will also need to configure the Default Attendant ID and Password.
The Attendant ID and Password that are entered in the Idealpos Global Options will be used in the event that an Idealpos Clerk does not have an Attendant ID/Password configured in their Idealpos Clerk Profile (Back Office > Setup > Clerks > POSTEC Mapping).
The Attendant ID and Password will need to exist in the POSTEC Forecourt Manager > Attendants > Attendant Details.
Attendant - Enter the Default Attendant ID as it appears in POSTEC Forecourt Manager.
Password - Enter the Default Attendant Password as it appears in POSTEC Forecourt Manager.